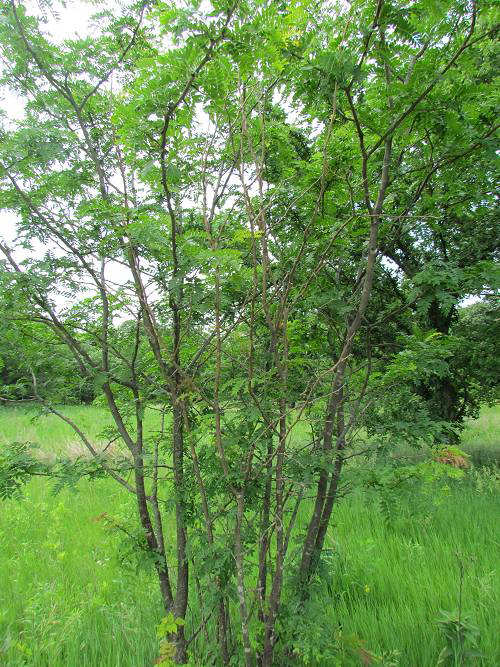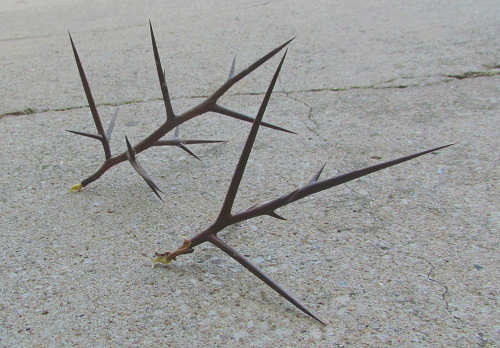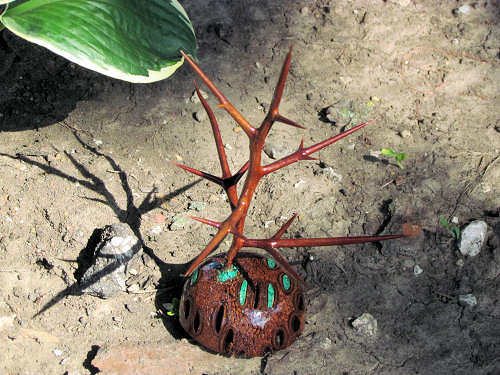


What we have here are Honey Locust thorns, otherwise known as Nature's Caltrop.
cal·trop (kltrp, kôl-)
n.

A device with four projecting spikes arranged so that three of the spikes provide a stable base while the fourth spike points upward.
In the middle ages it was used as weapon for denying battlefield entry to war horses and elephants.
Nature's version of the caltrop punctures tires and goes through footware.
The Honey Locust is a thoroughly nasty tree to have growing on your property.
There must be something useful to be done with these. We'll see what we can do.

The pile of banksia pod odds and ends looks like it may be good for something after all.

The base needs to be trimmed down a bit, I think.

This looks more reasonable but I think the base would look better rounded.

An easy way to find the approximate center of the banksia base.

For small turnings, two sided tape works well enough. Use a clamp to ensure the seal is tight.
Don't get too aggressive when turning. Two sided tape doesn't work that well.

A small bowl gouge works well on banksia pods. Beware the pod 'lips' flying off at high rates of speed.
I prefer safety glasses and a face shield as the 'lips' are being removed.

It didn't take long for the banksia base to fly off the mount but that's ok. It won't be much longer.
Looking at it, I think I will leave a hint of hair.

Power sanding while the piece is turning using 60 grit sand paper is a time saver.

The next step is to remove any seed parts from the banksia pod seed holes.

Now I need to figure out where to insert the honey locust thorns and mark the holes.
This is because I plan on using some inlay to accent the piece and don't want to fill up the wrong holes.

Inserting bits of paper towel into the banksia pod seed holes helps minimize the amount of inlay.
Push it down far enough so it doesn't show through the completed inlay.

A dual inlay should achieve the desired effect, so I'll use crushed Indian Sandstone and Malachite.
I pick these up as necklace strands from Hobby Lobby. Strands are $3.00 - $4.00 and last quite a while.

A cheap Chinese arbor press from Cummins is a handy tool to have.
Use a can with tall sides to contain any flying chips.

I've changed the inlay process a bit over the years to a two step approach.
Step 1: Add enough inlay to cover the tissue.
Add enough CA glue to cover the stones and no more. Hit with accellerant. Inspect the hole. You should not see any tissue.
Step 2: Over-fill the banksia pod seed holes and use enough CA glue to thoroughly wet the stones. Let this dry naturally.
The reason for this is to speed up the drying process and to ensure the tissue does not rise up as you apply CA glue.

Apply one more drop of CA glue to each inlay as a final step.
Let this dry naturally.

Mount the banksia pod piece back on the lathe and power sand down to at least 600 grit.
For a piece like this, 600 grit is more than adequate and once the honey locust thorns are added,
no one is going to care to conduct a close inspection anyway.

Glue in one thorn with just enough CA glue to hold it in place.
Backfill the hole with inlay and glue it in.
The process is repeated for the second thorn.
Doesn't look bad.

I am going to use a clear gloss, urethane spray for this project mainly because that's all I currently have on hand.
Before I do that, I use a can of compressed air to blow out the remaining banksia pod seed holes and remove any dust from the
honey locust thorns.
Since the overall color scheme is dark, I don't think it would be desirable to use anything which darken it further so the clear
gloss should work well.

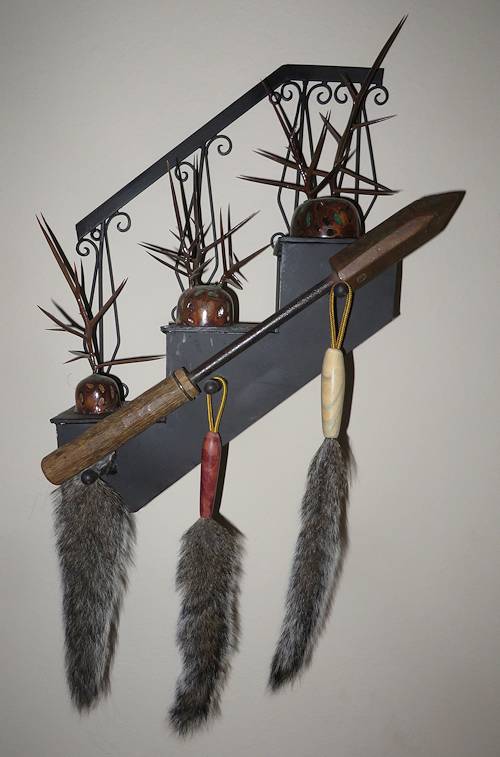
This is looking pretty good. It's going to take a day or so to dry and then I can take an artsy photo.

I spent some time considering what to call this.
I briefly thought because of the thorns, I would call it 'Deadly Art' but then changed plans because of watch lists -
wouldn't want to get flagged on the wrong list.
I decided to call this piece 'Deviant Art', which I thought was original. Turns out it's not.

If you like art, you should check out the Deviant Art site sometime. Some nice looking graphics there.

Maybe I should upload this one day...certainly looks rather deviant!
