Pen
Turning
Turning
pens
can be as simple or complex as you wish to make it. Me, I
prefer
relatively simple.
The example in this demonstration requires
basic skills and well sharpened tools.
The raw stock for producing pens is known as a pen blank.
There
are many materials to choose from.
Me, I prefer cheap or free
when I can get it.
These pen blanks were cut from the same stock for the green wood salad
bowls.
The blanks were dried in a microwave using
the Defrost
cycle.
Pay attention to what is going on as I don't
think a spouse would be particularly thrilled to
see a a rotating
platter of sticks on fire in her kitchen microwave..
Remove the pen blanks and let them cool off. Repeat the
process
until
they appear dry.
I usually use touch as a determination. Set
them aside for a couple days to stabilize moisture content.
Some folks use a gram scale to measure the moisture content after
microwaving.
I don't bother with that because I think they still
need to stabilize for a few days.
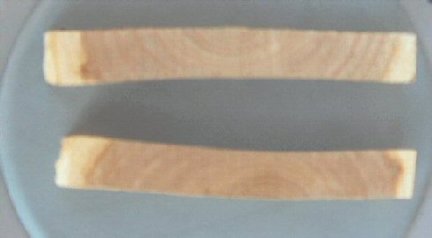
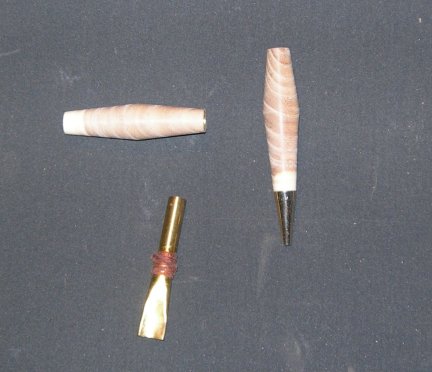
Pen blanks are generally cut with the grain. These are not.
Cross - grain turning is not usually recommended because the blank has
a tendency to shatter and it is rough on tools.
Pens produced this way are certainly unique in appearance.
I
always
use glasses and face shield when doing this type of turning.
Ensure your tools are well sharpened.
The material in thepen blank is usually the same type and
density. These
are not.
The white color at the ends of the blanks is the cambium
layer
just under the bark.
This is generally pretty soft.
The
center of the pen blank is much harder than the cambium layer.
This
means that care is going to have to be used when turning and sanding so
the outer,
softer parts of the blank are turned at the same rate as the
harder material on the inside.
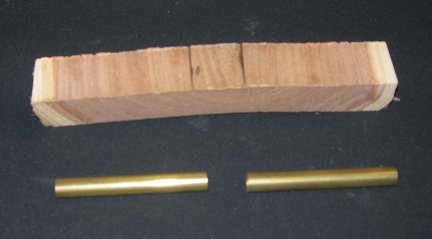
Cut the pen blank into two pieces .
The length should be about 1/8"
longer than the brass tubes.
Leave a little extra when
dealing
with wood you have no experience with.
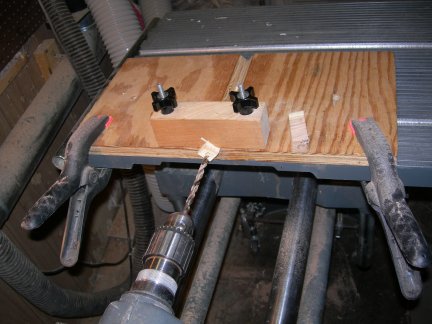
The blanks are then drilled.
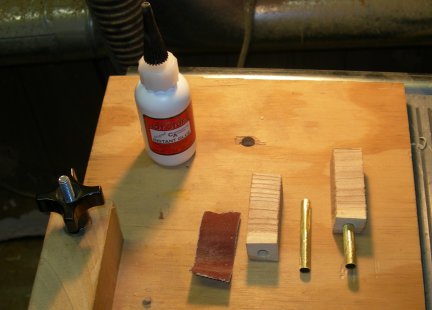
Take some sand paper and rough up the brass tubes.
Apply
CA
glue to the tubes and insert into the blanks, twisting the tubes to get
good glue coverage.
Save the caps from the CA glue bottles.
These are useful for
holding the brass tubes and keeping glue off your fingers.
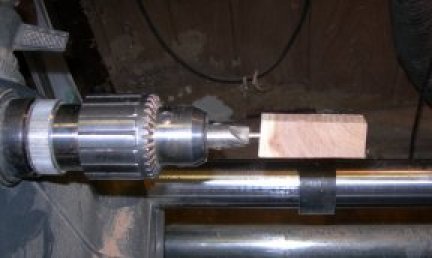
A pen mill is then used to mill the wood down to the brass tube.
It ensures the ends are flat and perpendicular to the blank.
I am only using the lathe to hold the mill and am turning it
by
hand.
I know the cadmium is soft so I use a little extra
caution.
Stop milling when you see new brass.
I apply a few drops of
thin
ca glue to the wood surrounding the tube.
It seems to help
prevent tear out and also helps ensure the blank is glued to the brass.
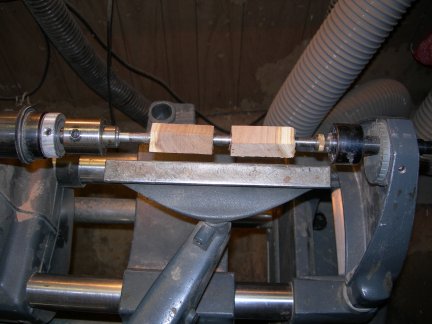
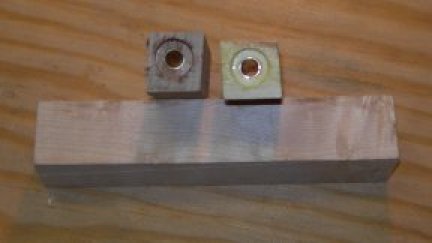
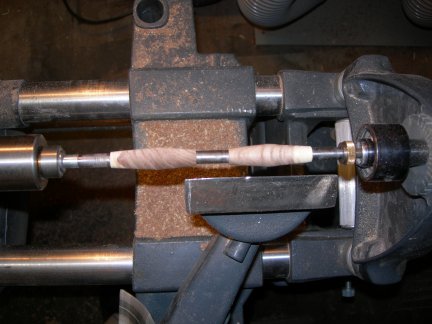
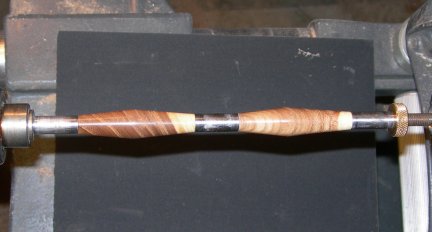
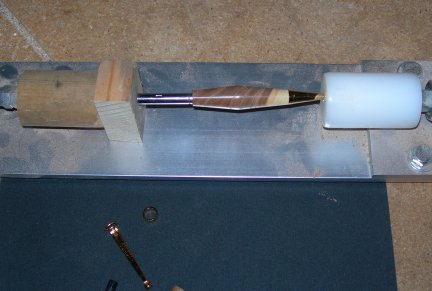
Pen blanks mounted on a mandrel which is then attached to the
lathe.
They are separated by bushings.
The blanks are
tensioned
using the knurled brass nut pictured on the right side.
Hand Tight is
usually sufficient.
Over-tightening will cause the
mandrel
to bend.
Turning speed is slow while getting the pen blanks round.
Use
light
pressure and patience during this step, bearing in mind that cutting
is cross-grain.
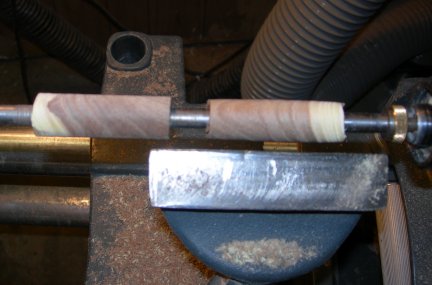
So far so good. No explosions or other major problems.
I
generally turn the both pen blanks using the same general pattern
before
making
a determination as to which end will be the pen top and bottom.
I use a caliper to determine the proper thickness.
My track
record in doing this by site alone is not good.
The pen blanks are turned down to match the diameter of the
bushings separating them.
It seems that when turning
cross-grain, the closer you are to the end result, the more
likely
the
wood is to explode.
So, I chickened out because turning
is
going so well. I am going to sand the rest of the way down.
Because some of the wood is soft, I use a sanding block to sand with.
The block in this case is another blank.
This way I have less
chance of taking too much off the ends.
I start with 150 grit and will finish with 600 grit.
I
usually
stop at 400 grit but cross-cut wood can really shine if you take that
extra step.
Ever walked down a set of stairs and always seem to catch your heel on
one step?
This is because the carpenter got it wrong and one
step is at least 1/4" different in height from the others.
Your foot can detect the difference.
That is meant to be sort of analogous to the difference between the
diameter of the wood versus
the diameter of the the pen pieces.
You
will feel a catch if there is a difference, even if it is very slight.
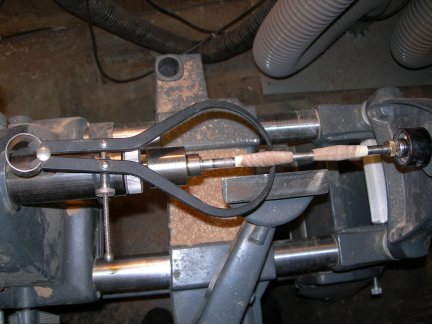
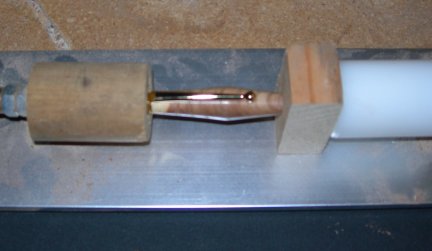
I remove the pen blanks from the lathe and check the actual fit before
the final finish using a special tool.
Pen pieces are press - fit and it is tough to disassemble a pen once
the
parts are pressed in place.
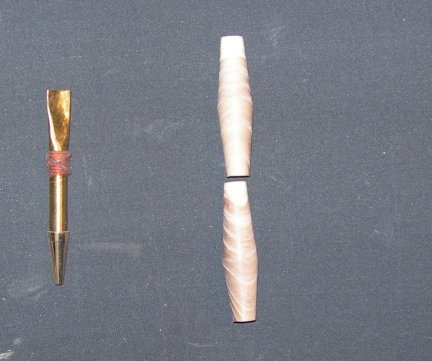
I took a spare nib and filed down the part that inserts into the brass
tube.
It easily inserts into the pen blank to perform a final check.
If I feel a catch, I can return it to the lathe and take a little more
off.
It is an extra step, but I think it is worth it.
Both sides check out fine.
I put the pen parts back on the lathe without the
bushings as a final step
and use 600 grit sand paper to smooth the edges off a little.
There are all kinds of different ways to finish pens.
I've
probably been through most of them and most do not hold up to
the
Purse Test.
Purse
Test
1. Ask a female who has a purse to carry and use one of your
finished pens for a couple months.
2. Remove from purse and examine finish.
Odds are the finish doesn't look too good.
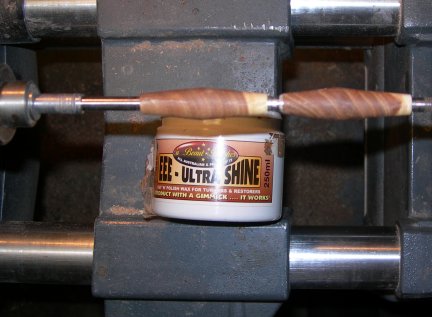
My personal finishing solution:
1. Apply EEE-Ultrashine using the directions on
the jar.
This
is a friction polish that is something similar to some lapidary
compounds in that there is a grit in the finish.
Use a
lot of friction, getting the wood good and hot so all the wax is
removed. Paper towels work
well as an applicator.
2. Apply a small amount of Ultrashine to a paper
towel and
spread it out a little.
Add a couple drops of CA glue to the center of the Ultrashine on the
towel.
The CA glue will
pool on top of the wax.
Note: I tried
taking a couple pictures of this but the end result ended
up looking like something rather, well - unsanitary.
3. Start the lathe and apply the CA glue and
Ultrashine to
the wood.
Slowly rub it in using normal pressure.
4. Clean off the excess and use finger pressure
to get the
wood good and hot again.
5. Repeat steps 2, 3 and 4.
The end result is a very nice looking hard finish.
It
does not look
glassy or plasticy like some of the other CA finishing techniques.
It
is very durable
and actually passes the Purse Test.
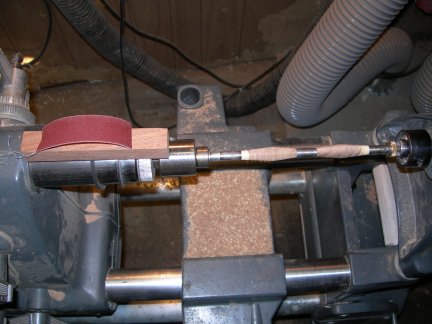
The finished pen blanks can now be removed from the lathe.
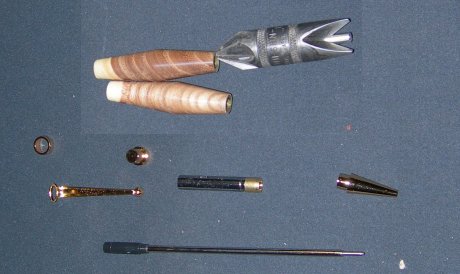
The last thing I do with the to finish the pen barrels is to use the
pen mill and give each end a couple
light twists, removing any glue or was buildup.
I then use the chamfering tool pictured (upper right) on each
end to make the press-fits easier.
The bottom portion of the pen is pressed together using a pen
press.
So is the top.
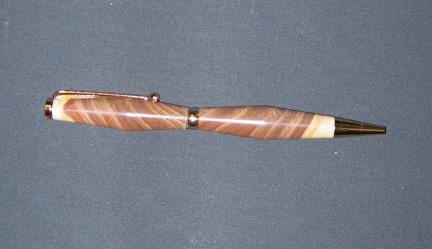
The finished pen looks pretty nice for a product from the
urban jungle.
There are three reasons I generally use this particular
profile.
1. I like it
2. Purse Test feedback reveals this design
works very
well because the pen stays in check book
holders where the
normally profiled pen slips out and ends up getting bounced around..
3. The design seems to enhance natural
characteristics of wood by refracting light differently.
With
cross or diagonally cut woods, the effect can be very eye catching.
That's all there is to it.
Unless you
wish to
turn a pencil and make a matched set.....

This set
was for Gene,
a friend from work whose last day is coming up soon.