04-2010 thru 08-2010
Fair Warning to those North of the Border:
There are illustrations provided involving the use of chainsaws and chainsaw-related tools
which could easily cause an involuntary clenching of the bowels should one possess a delicate constitution.
I thought I was pretty much done with large, salad mixing bowls but unfortunately the more
friends and family that saw them, the more the spouses wanted one.
I will admit they are more pleasing as a dinnertime presentation than a cheap plastic bowl from Walmart.
So,I'll be going down this path one more time mainly due to obligation with a little guilt mixed in for good measure.
The Reason for this Obligation?

That would be Anna (she's the slightly older one).

Anna's sideline is this contraption. It's amazing what can be done with this in skilled hands.
If you're not skilled, this thing is computerized in that you feed it a pattern off the PC and supply
it with the colored threads it needs, push the magic button and it does the rest.
The following are a few examples of Anna's custom, not computerized creations.


It was this pillow that really caught my eye. It was a perfect color and pattern that would match my wife's living room spring motif.
I asked Anna if she would make me a pillow like this. I thought it would be a no-brainer because I figured this must have come from a computerized pattern and would be no trouble at all.
Little did I know until a couple months later, that this was all hand stitched. It took a while to create and I felt kind of guilty about that.
Matched the living room beautifully though.
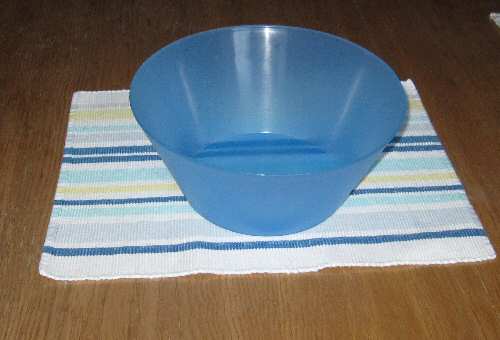
So when Anna said she'd really like one of those salad mixing bowls to replace the cheapo blue Walmart special and preferably from a wood native to the state, I felt as though I had a sense of obligation to see what I could do about that.
The Blanks
For Salad Mixing Bowls, my definition of big is anywhere from 12-16 inches in diameter, and 4-6 inches deep. You can find dry blanks that large but be prepared to lay out the $$ for anything that looks reasonably nice and has some figuring.
Trying to find a dry bowl blank of large enough size from native wood from around here is not an easy task.
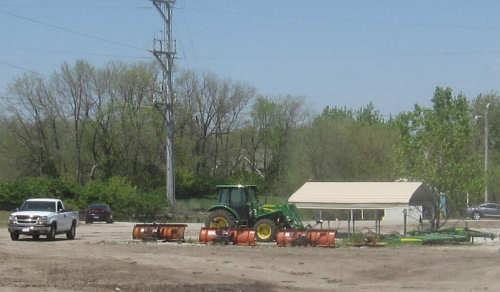
However, a large green blank of the required size is not out of the realm of possibility considering the severe storms which periodically wreak havoc throughout the Midwest.
The best time to search for large pieces of green wood?
Wait a week or two after a major storm and pay a visit to the limb dump and see what you can scrounge up.
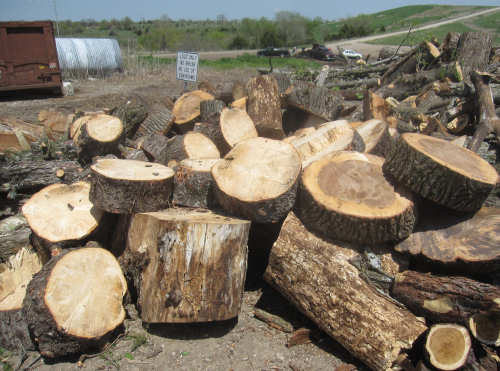
Must be something in this pile......
Look at what I found!
I do believe this will work.
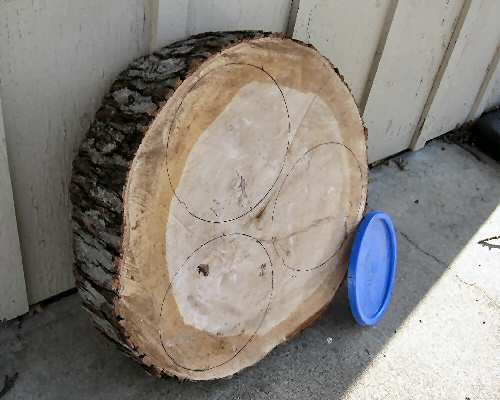
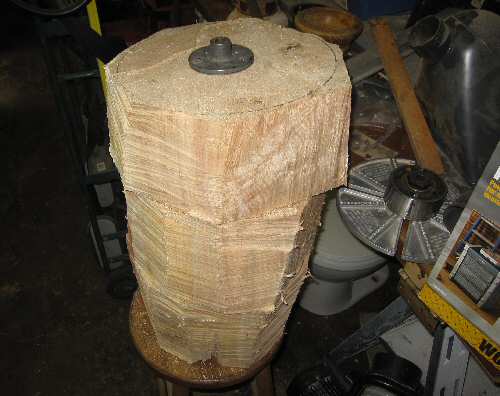
This piece I found was actually pre-cut and it is anywhere from 7-10" thick!
The template is the top of a five gallon plastic bucket.
I think this is probably maple but who knows. Around here if you don't know what it is, maple is a safe bet.
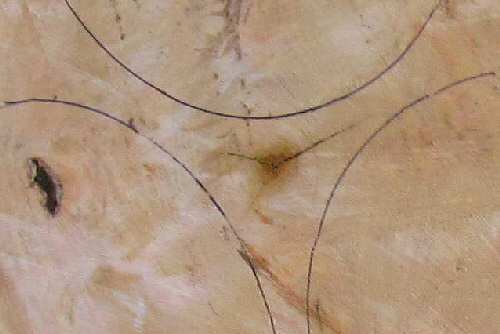
The grain looks very tight and I only saw one inclusion. The center has barely started cracking.
Green wood cracks from the center out as it dries. You need to avoid this area and get those bowl blanks cut out as soon as possible.
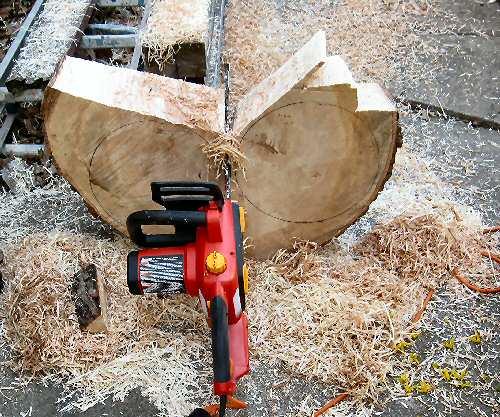
Cutting this piece of green wood down to size requires that I replace my cheapo Chinese manufactured chainsaw with a 14" bar sold at Walmart, with a cheapo Chinese manufactured chainsaw with at 16" bar sold at Home Depot.
The saw made short work of this.
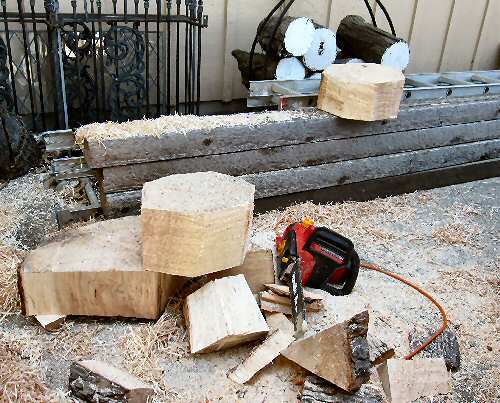
A couple hours later I have three green salad bowl rounds. Green rounds should be turned down as soon as possible.
Day One
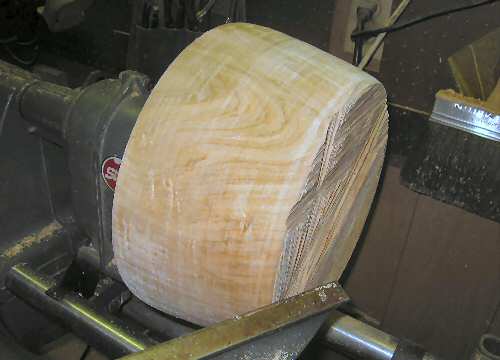
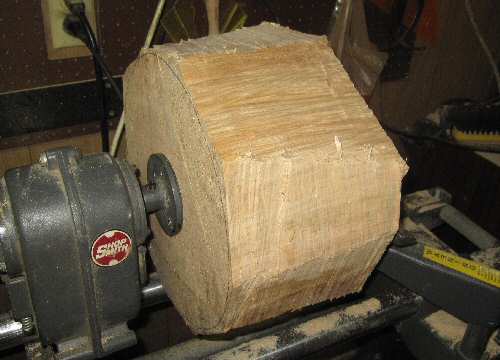
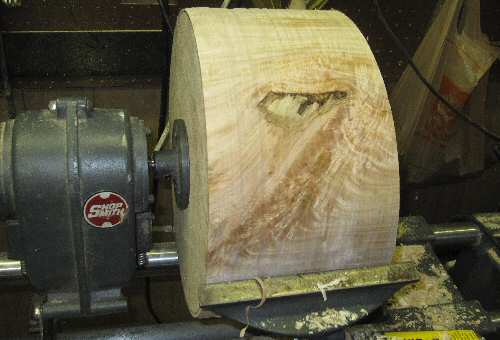
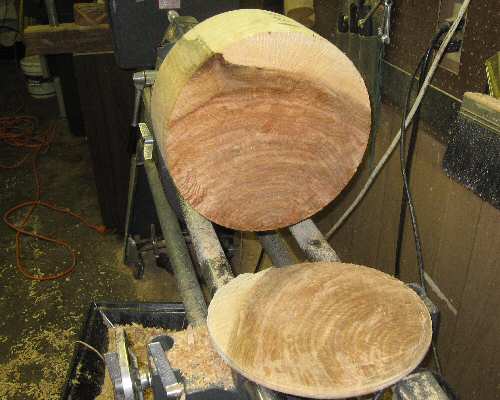
The first green bowl round to be turned is the smallest one. I can get about 5.5 inches of depth out of this. It is about 17 pounds.
I generally mark the base of round with a black magic marker or a grease pencil to help keep track of where I am at.....
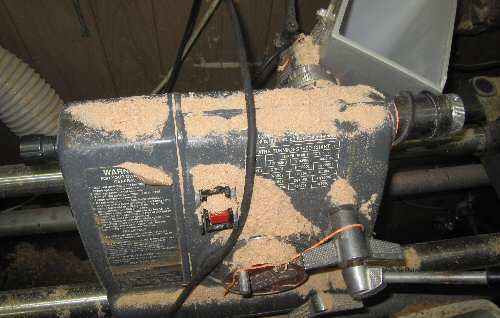
The starting speed is as low as I can go. The Shopsmith with a reduction gear set at it's lowest level is about 100 rpm.
and then make it more permanent.
Green wood does have it's advantages in that it is extremely easy to turn and since the wood is green, the chips fall straight to the ground and there is very little dust. Green wood also = only having to sharpen the tool of choice at the outset.
This round has a large divot but that's ok because the tail end is going to be the bowl bottom, I increase the bowl speed as the blank gets rounder, stopping when I begin to feel vibration.
Getting the green bowl round to this point takes less than an hour.
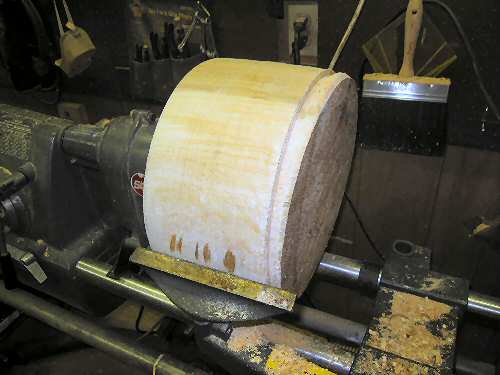
I have some gouges on the bottom approaching 3/8" of an inch and I am not interested in spending much more time on this today so I am opting for an alternate method of squaring up the bottom.
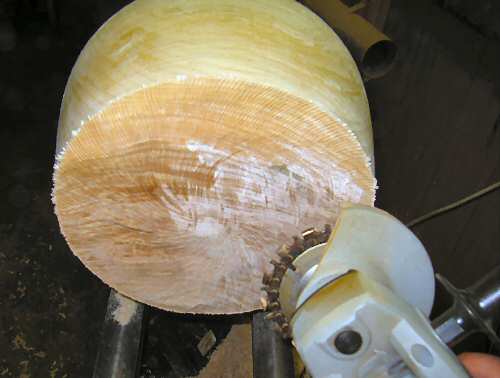
This little gem of a tool cleans up the bowl bottom in under 60 seconds. Blank turning speed is around 300 rpm.
Now that I have a nice, totally green bowl blank. How do I dry it?
What is considered to be the definitive guide on drying hardwoods is here: 'Drying Hard Woods'
It's only 120-140 pages of research.
Failing that:
Ask 10 different people this question and you will get 10 different answers which will range from the exotic to the simplistic.
It also depends on the type of wood involved and the time required for the blank to dry:
1. When do I need a dry blank? - A couple months before Christmas and this is April of 2010 so that equates to about 6 months.
2. What kind of wood is it? - Maple, I think.
Wood dries naturally at about 1/4" a month using the bowl and paper bag technique. The less wood, the faster it dries so an obvious question would be why don't I hollow out the blank?
Because different species of wood warps differently when drying. I will hollow out smaller rounds and that works quite well. However, I have not had good, consistent success hollowing out the larger green bowl blanks prior to drying. Large, green bowl blanks are not that easy to come by so it would be prudent here to optimize my chances for success.
This is not to say however, that the round has to be completely dry before turning.
If you can get the moisture content down to somewhere around 14-16%, that is generally good enough to do a rough turning without having to worry about cracking.
Using conventional drying methods I am a little short on time, but there is a solution.
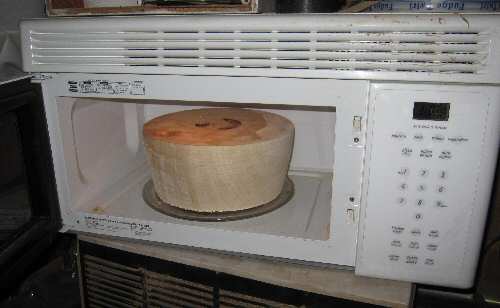
I've become the Master of Microwave Wood Drying.
Shop the yard sales and places like Cummins or Harbor Freight and look for a large, slightly used or 'open box' microwave.
The only requirement is that it is big enough and that it has a defrost cycle. Butch found this one for $10.00 as an open box item with no glass plate..
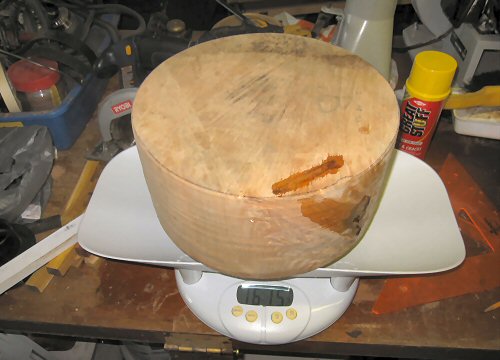
Weigh the round and divide by either three or four. Starting out, I will use one third of the weight to get the ball rolling.
Insert round and set the microwave to defrost at one third of the green rounds weight or in this case, about 4 pounds which equates to 30 minutes of microwaving (on defrost).
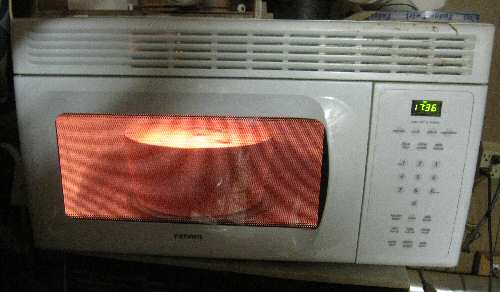
Interesting picture.
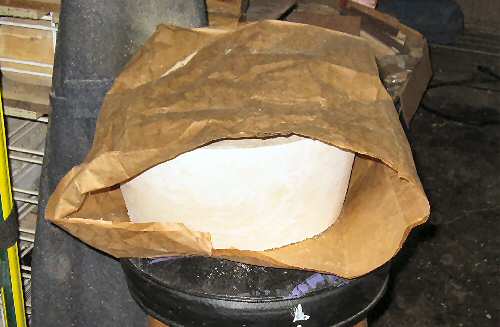
Remove the green round from the microwave and place in in a heavy paper bag.
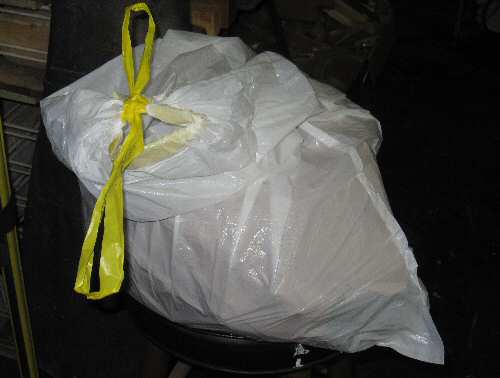
Place the bag in a plastic bag, loosely tied at top to provide a bit of ventilation and stick in a corner somewhere.
Every week or so, remove the round, microwave again on defrost and place in a dry paper bag, followed by the plastic bag.
** Ensure you give the green round a good visual check before hitting it again with the microwave. **
If you start seeing any checking, small cracks etc, lighten up on the microwaving and extend the drying time. Not all microwaves are built equal and not all woods are the same. Rounds cut with or against the grain or anything in between will also have an effect.
I know this considerably shortens drying time but I never actually measured it. This green round first went into the sack April 12, 2010.
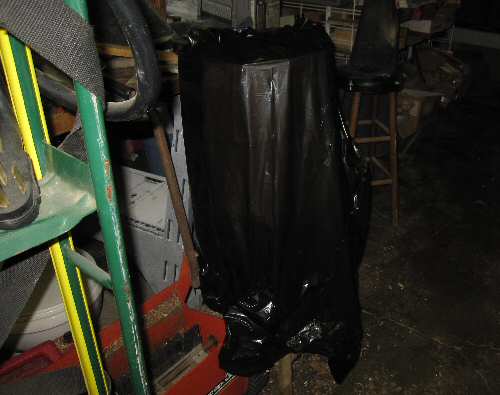
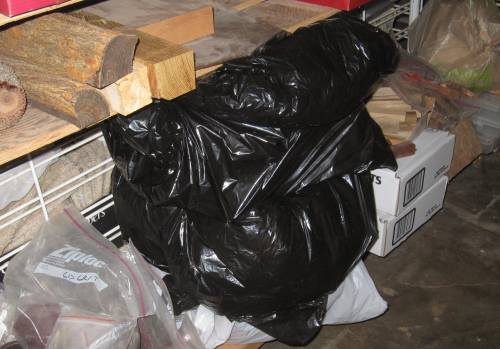
Green rounds awaiting turning should be covered with something to slow down the drying process. In this case, a heavy duty plastic lawn and leaf bag works just fine.
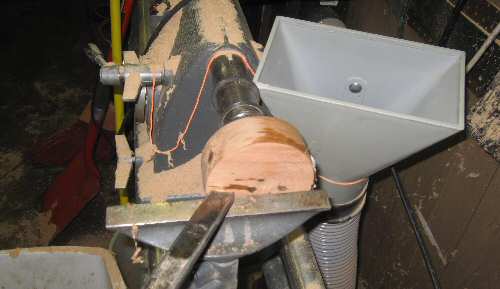
Another Alternate Flattening Method
The next green round while reasonably round, is going to require a lot of end turning and it weighs about 25 pounds.
There is some nice figuring in this blank and a possible problematic defect and I have a lot of overhang.
What to do, what to do.
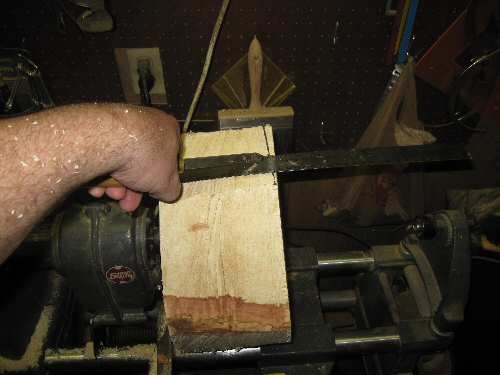
Cut a nice, deep groove with the parting tool at least 1/2" deep and 1/4" or so wide - at least wide enough for a chainsaw bar to fit into.
Set the lathe to its lowest speed. In this case, it is about 100 rpm.
Start the lathe.
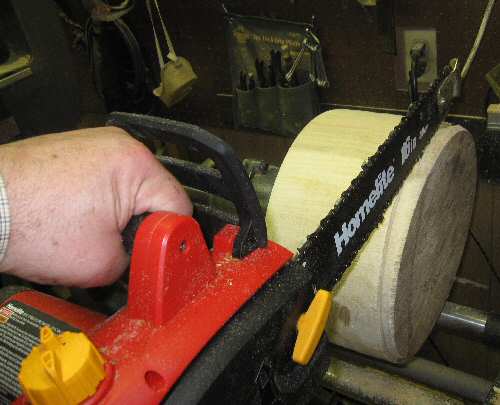
Start the chainsaw (this is an electric one) and insert into groove, using light, steady, downward pressure.
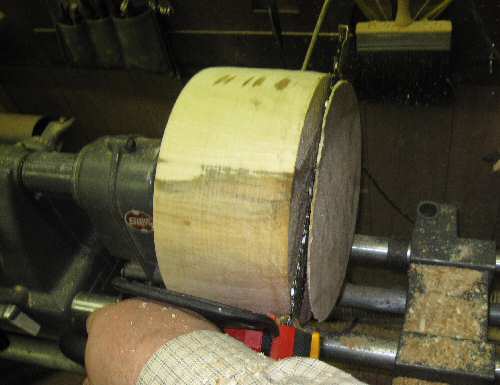
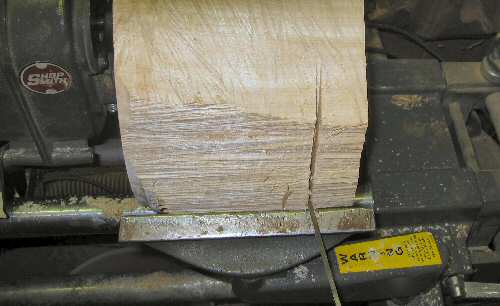
About 60 seconds later.......
....the green round is flat and ready for the microwave.
My foray into the creative use of the chainsaw in wood turning however, pales in comparison to this:
More Detail on the Drying Process

Open the plastic bowl storage bag after a week or so and have a look at the paper bags.
If the paper looks something like this, it is time to change the bags. Keeping wet paper bags on green bowl blanks for too long coats those nice looking green bowl blanks with a not so attractive layer of mold, which can get disgusting.
Checking for Dryness
The two commonly used methods for checking the moisture content in green wood are:
1. Periodically weigh and record the weight of the blank. The bowl blank is considered good to go after a couple consistent weight readings are recorded. This method works well enough for the small stuff but try fitting one of these bowl blanks on a gram scale.
I use a bathroom scale for the big blanks. Not the most accurate way to measure but it does trend over time.
2. Measure moisture content by using a high tech, precision manufactured device available from Amazon for about $20.00 and change.
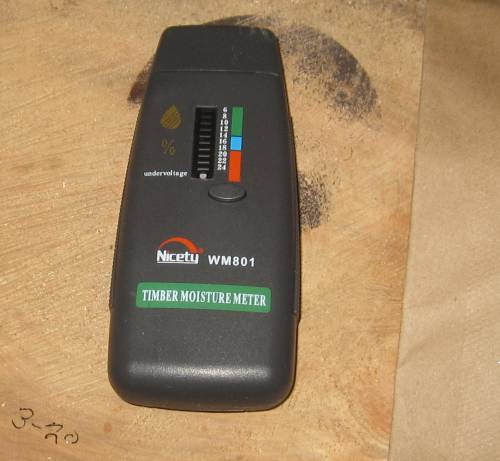
The moisture content meter shown here records values from 6 - 24% moisture. In most climates a reading of 8% is considered dry:
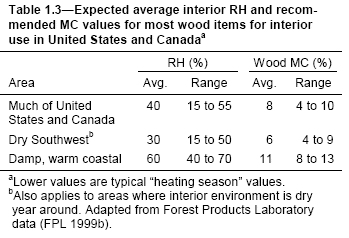
RH = Relative Humidity. MC = Moisture Content.
Check the content of a few pieces of dry wood around the house to get an idea of what 'dry' is for your area. This will give you an idea of how dry the green bowl blanks need to be before you start turning.
These people really need to work on their user manual.
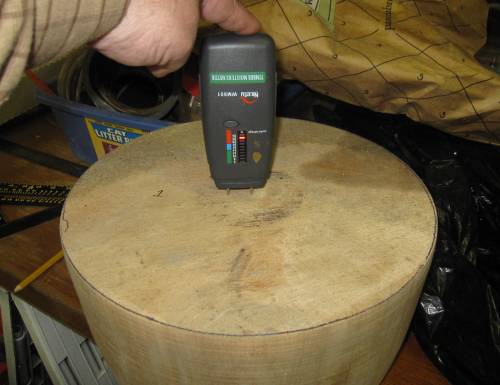
Take several readings in different areas to come up with an average. Different wood densities within the blank dry at different speeds - wood near the heart, knotted areas, size of the round are three examples.
Note: It really isn't worth the time to do this when you know the blank is not dry. Just wastes batteries. Best to use a scale until the blank gets quite dry.
Return the bowl blanks to the microwave and nuke them on defrost using approximately 1/3 - 1/4 of their weight to set the defrost time.
Immediately bag the green bowl blank and place back in storage.
If you don't do this and let the round sit out for an hour or two, the bowl blank can start checking. Odds are by the time I'm done with this I will have a photo of checking. It's easy to get distracted while waiting that 1/2 hour or so while the microwave is nuking the blank.
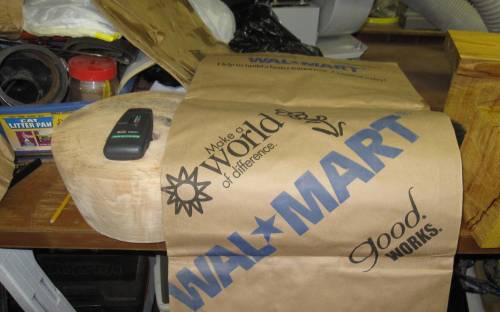
Walmart Lawn & Leaf bags are good choices for large bowl blanks.
They are tough, inexpensive and can easily hold the larger chunks of green wood.
Bag the rounds as before and return them to storage.
Additional Drying Comments
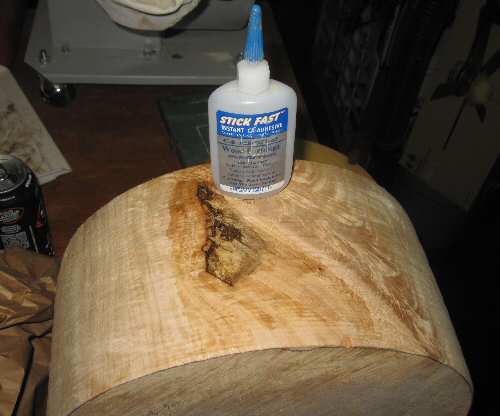
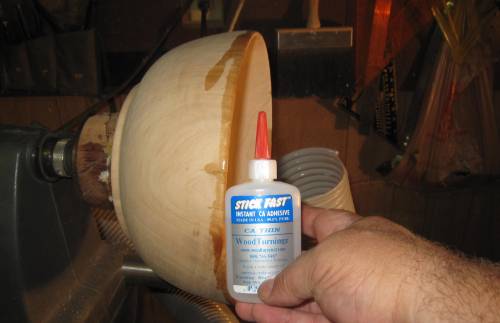
This bowl blank has a defect and I am not sure how deep it runs. It will however start cracking out at some point during the 'Microwave on defrost' process. Coat the area around the defect with CA glue and add a fair amount of CA glue to the defect itself. This will stabilize the area.
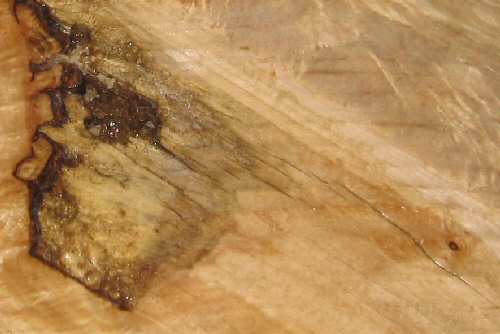
You can see the cracks radiating out. When you see them, cover with a medium CA glue or thicker, and monitor.
I've successfully dried a number of large blanks doing this. You would think that if you stop this crack, it is going to start cracking somewhere else. It doesn't. Usually.
Since I've never actually recorded the time involved using the microwave method so I'm providing a table below which I will update on a periodic basis.
| Reading Date |
Moisture Content | ||
| Blank C | Blank B | Blank A | |
| 04/21/10 | 15.4 lbs - 20-22% | 20.5 lbs - 20% | 21.5 lbs -18-20% |
| 5/9/2010 | 14.2 lbs | 19.6 lbs | 20.0 lbs |
| 5/16/2010 | 14.4 lbs | 19.8 lbs | 19.8 lbs |
| 5/26/2010 | 13.6 lbs - 16-18% | 19.6 lbs - 16-18% | 19.6 lbs @ 20% |
| 6/6/2010 | 12.8 lbs - 14-16% | 18.8 lbs | 18.5 lbs |
| 6/14/2010 | 18.0 lbs | 18.0 lbs | |
| 6/20/2010 | 18.0 lbs | 18.0 lbs | |
| 6/27/2010 | 18.0 lbs | 18.0 lbs | |
| 7/24/2010 | *16.55 lbs | 16.35 lbs | |
| 8/14/2010 | 15.9 lbs | 15.15 lbs | |
| 8/28/2010 | 15.7 lbs | 15.10 lbs | |
| 9/17/2010 | 15.5 lbs - @10% | 14.95 lbs - 8-10% | |
| 9/26/2010 | 15.3 lbs | 14.80 | |
| 7/24/2010 | *Went to a better scale. | ||
| 3/19/2011 | 14.9 - 8.4% | 13.14 - 8.2% | |
The New Scale

I got this Salter baby scale from Amazon for about $50.00, supposedly at 50% off. It measures down to 1/10th of an ounce and ranges up to about 40 pounds. It also measures in metric.
This will work out quite well.
Back to Turning
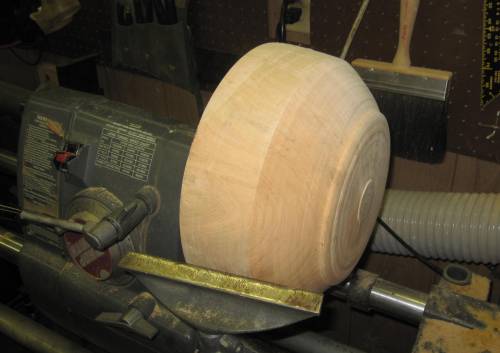
Blank C in my opinion after only six weeks or so of specialized microwave treatment, is good to go. I let it set out on the bench for an hour or so before taking moisture content readings, which ranged from 14-16%.
The bowl blank also has to 'feel' more or less dry, and this is entirely subjective.
I think this one can now be rough turned. The bowl at this stage is not dry, but it has shed enough moisture that there should be no further warpage or cracking. It will still have to be bagged and tagged when not on the lathe.
A secondary check is to feel the dryness of the chips as they come off the blank. They should feel dry and pretty much drop off your arms and clothing. These do.
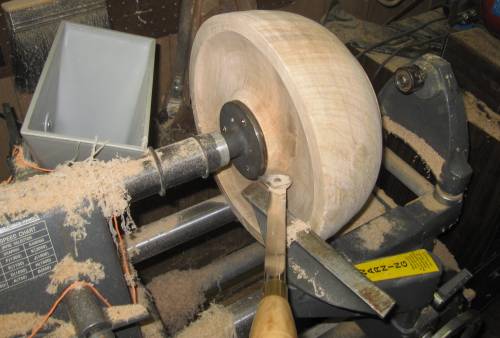
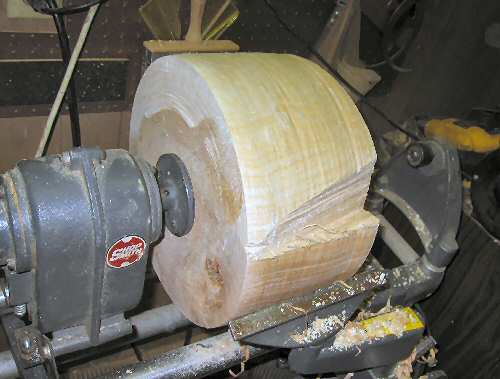
The outside of the green bowl blank is turned about the way I want it and before I turn it around I take the opportunity to remove some interior material while I still have tail stock support. This is also a good time to take the opportunity to experiment. This tool is an adjustable scraper which appears to work quite will if it is adequately sharpened.
It's hard maintain a decent angle with conventional bowl gouges using this kind of a set up. However if you are left-handed, you can do ok.
The reason for taking material out now is to move the bulk of the round's weight closer to the head stock once it is reversed.
The slowest I can go is about 500 rpm without a gear reducer and the idea of having the bulk of the weight of the bowl blank away from the head stock I think, is not a healthy option.
Oh, and don't forget to bag the blank when not turning so moisture evaporation is kept minimized.
With temps approaching 90 degrees in the garage again, I don't stay in there for long periods of time.
I am satisfied with the depth. I think this will be much safer when reversed.
But what about that big chunk in the center? We'll get to that in a couple days.
It requires nerves of steel.
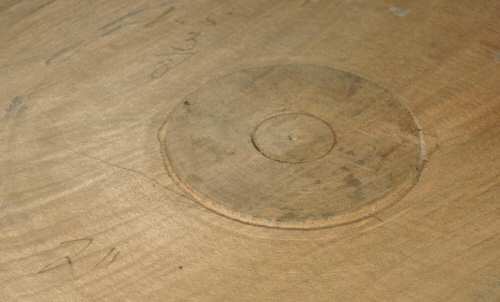
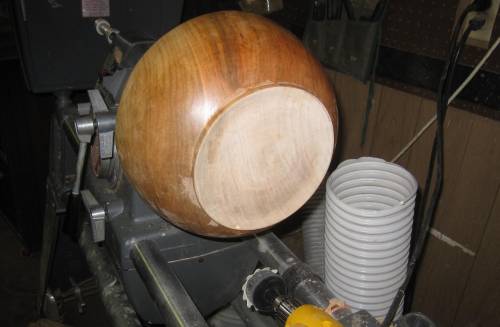
The green bowl blank has been removed from the lathe. The bowl bottom has a 2" raised section of about 1/8" of an inch.
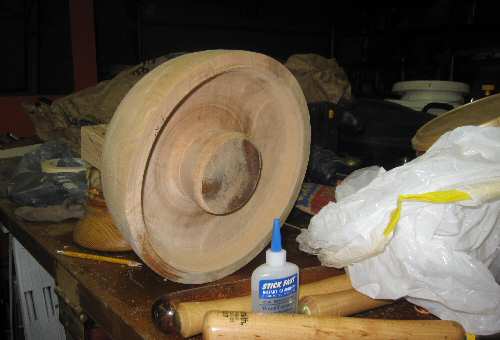
I am cleaning up a sacrificial block which will be used with the bowl.
Question: "Why don't I use a chuck since I have a really good one?"
Answer:
1. Green wood does not make for a good, solid tenon and on some occasions I have crushed those tenons.
2. At least once or twice during the turning process I lose concentration or something else happens where I run the gouge into the side of the bowl. Hard. Do it hard enough and and the blank goes off center, which requires re-straightening the blank the the inevitable loss of wood. Mix in that with a soft tenon and it's a joy trying to straighten everything out.
3. I frequently ending up wanting to use the entire round. This is especially true for the smaller, spalted rounds where you don't have much to work with anyway. And......depending on the condition of the spalted wood, crushed tenons are practically baked in the cake.
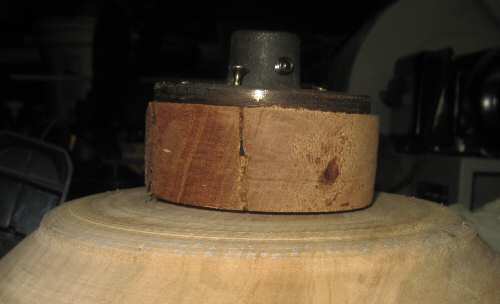
This is what I am aiming for. I keep a raised edge on the bowl bottom so I can work in lots of glue.
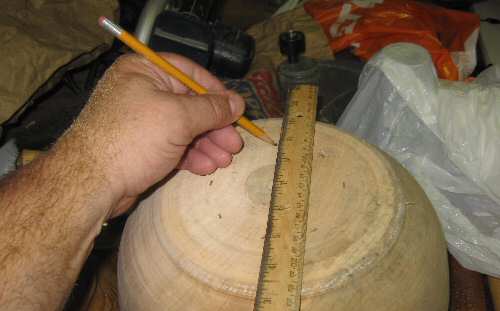
You have to of course find the approximate center to avoid wood loss.
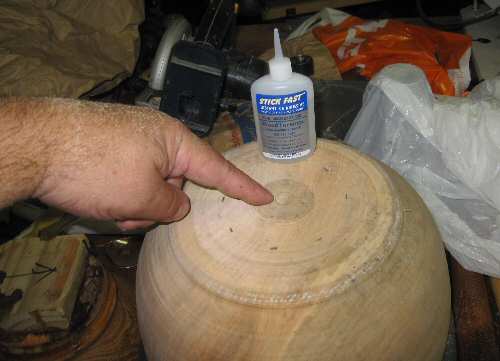
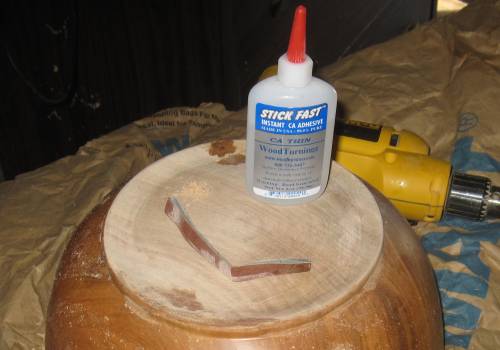
Ok, I know where center is and now I want to anchor the sacrificial block to the bottom of the bowl blank. I use a medium CA glue so I have some time to tweak. Cover the raised portion with CA glue.
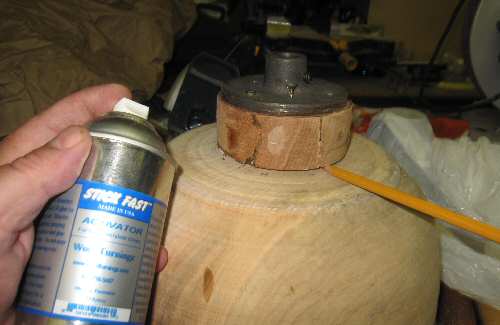
Level out the block by whatever means necessary (in this case it was a level and a pencil) and then lock it into position using a CA glue accelerator.
I like Stick Fast. It's cheap and you get lots of it, and it works.
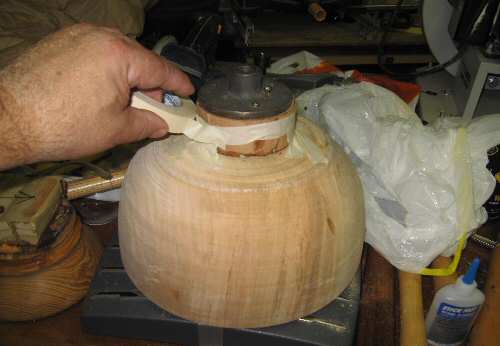
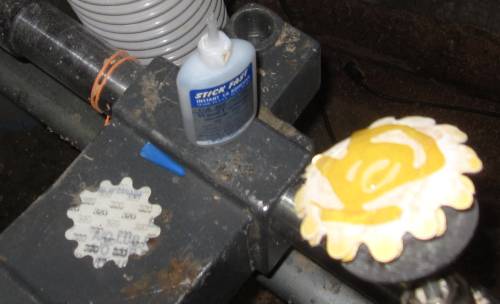
The next step is to mask off almost all of the gap between the block and the blank. It will contain the secret sauce.
Find some sawdust. There must be some somewhere............
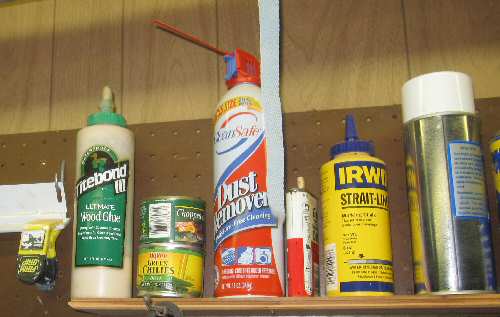
Get some wood glue. Titebond III works nicely.
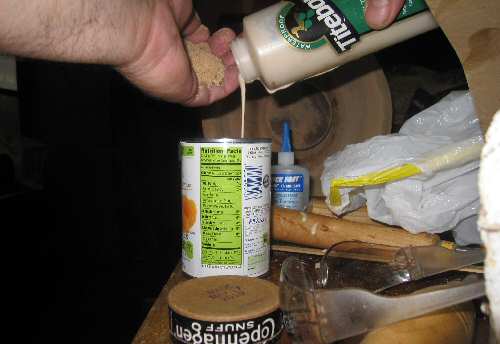
Mix the two together. The reason for this is that glue itself when used to fill gaps is not a good bonding agent. If you mix the glue with sawdust and use that, you will have a very strong seal.
........and don't forget to mix the two together.
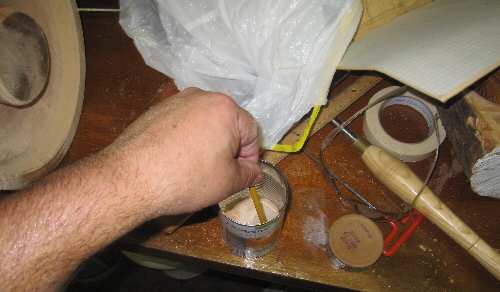
Fill the void between the block and the bowl blank with the secret sauce.
When the void is full, add extra sawdust to the open area.....
......and let it sit until the glue dries. For something like this, I'd give it three days minimum.
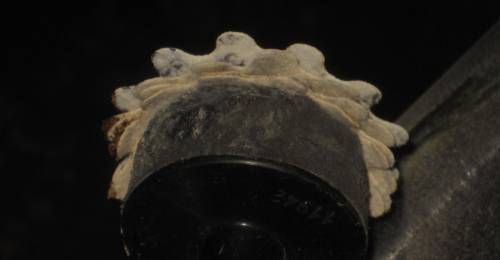
Don't forget to remove the masking tape after a day or so. Takes a long time to dry if you leave the tape.
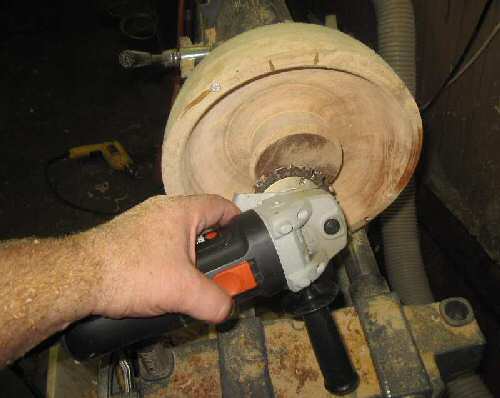
Three days later and I know that I am going to make some from the great white north queasy,
but the most expeditious way to remove the center piece is to make use of the grinder with chain saw blade attached.
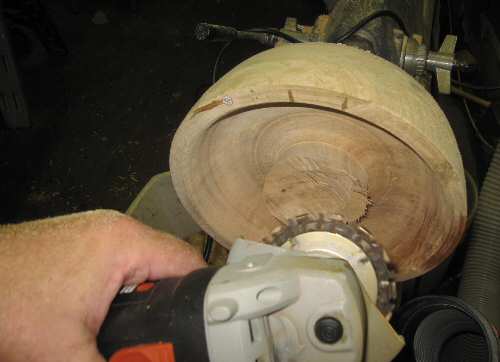
A minute or so into the project it is working nicely.
Note: The lathe is not spinning. It is merely holding the piece.
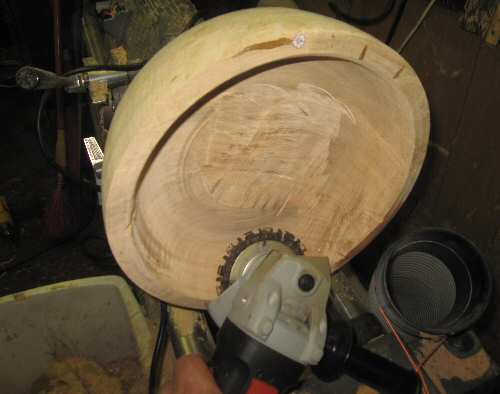
Somewhere around three minutes later, the center piece is removed.
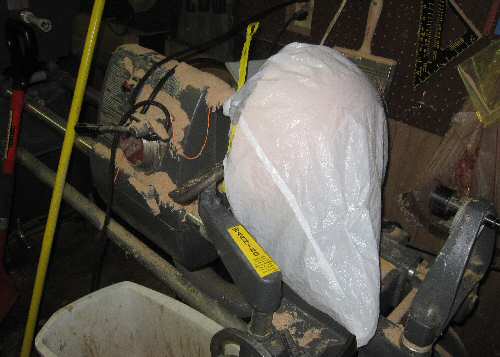
I spend another few minutes removing more material and then it's Back in the Sack.
Note: I totally forgot to put the blank back in the sack when I glued on the sacrificial block,
I was focused on getting the block glued solid and as a consequence I had some cracking going on,
which I controlled with medium CA glue.
...............
I think this will be ok but as a result the walls are much thinner than what I would like at this stage in the game.........

7-23-2010
The bowl blank is still wrapped in paper but with no surrounding plastic and it has not been cracking or warping. Total weight is 6.1 lbs.
About 50% of the mass has been removed.
8-21-2010
Well, it's getting there.
The garage is once again cool enough to work in and you know what the scary thing is......
turning down the bowl walls to 1/4" and not even realizing it.
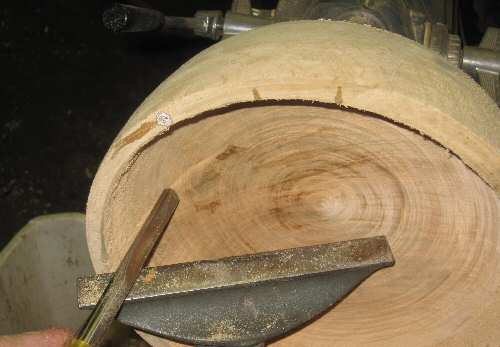
After letting this sit for a day or so, I started noticing some very small cracks in the bowl rim. Not sure what is causing them but a very light sanding job to fill the cracks in with sawdust and an application of CA thin CA glue around the outer rim looks like it did the trick.
Best to let it sit for another day or so.
Power Sanding with New Wave sanding disks is now my finishing method of choice.
Money Saving Tip: Do not buy these in the 5-packs at the Woodcraft. You can buy these 25 at a time from Amazon.
A 5-pack at Woodcraft may cost you $3.99.
A 25 pack (Five Packs of Five) sold by Woodcraft through Amazon costs $8.00 and change.
I'm finishing the outside to 400 grit and the inside to 320.
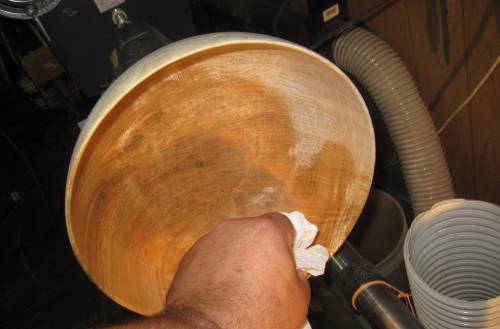
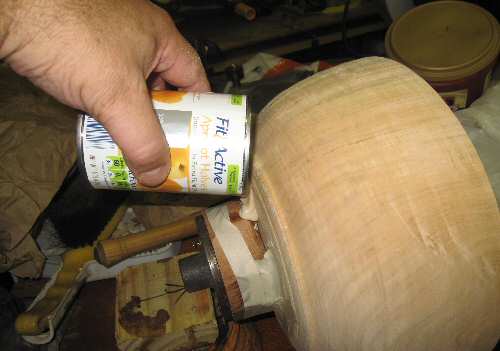
Tung Oil is the finish for this bowl. Put on a nice, thick layer while the bowl is on the lathe.
What works best for me is to put on the first application of tung oil while the bowl is on the lathe because it easy to remove any extra oil.
Let the oil work itself in for half an hour or so and then spin up the lathe and rub the extra oil out. Use some friction.
Rub it out again after another half or or perhaps a day later. No time constraint here, but you do want to ensure all excess oil is removed.
Excess tung oil on a 'finished' piece is not a pretty sight.
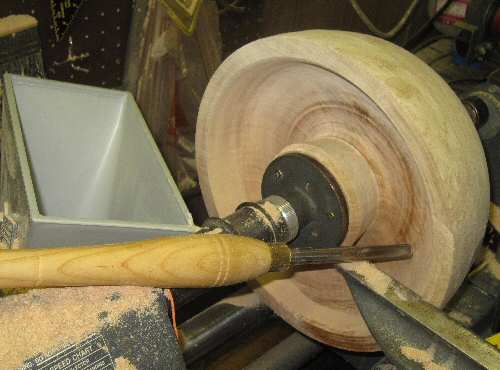
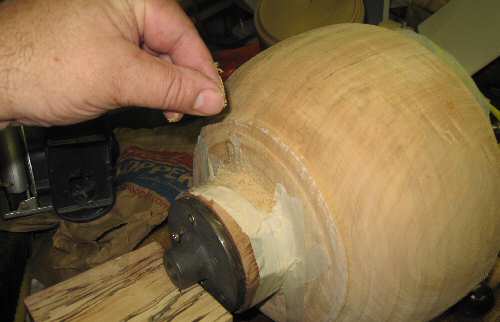
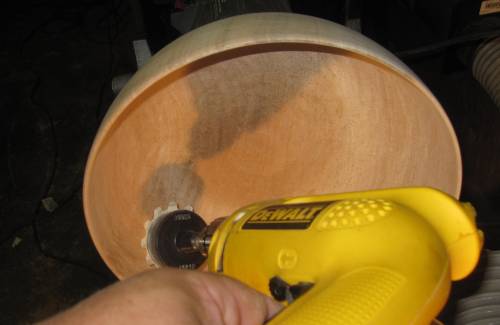
Time to clean up the bowl bottom and........

What's wrong with this picture? Needless to say, caution is being used.
Helpful hint: Double-Stick tape works wonders here.
There was some checking going on that I hadn't noticed. Some of it was fairly deep but there wasn't much and it can be repaired.
Have you had problems with these new wave sanding discs flying off when you are trying to sand, particularly with the coarser grits?
One thing that works really well is to glue the disks directly to an old sanding pad.
Medium CA glue and some accellerant work wonders.
Pull extra pads off when the pile gets too thick. Using CA glue on the stiff disks cuts the aggravation factor way down.

One thing to remember is to clean up the bowl bottom of whatever piece you are working on, as well.
It completes the project and makes for a more professional looking piece.
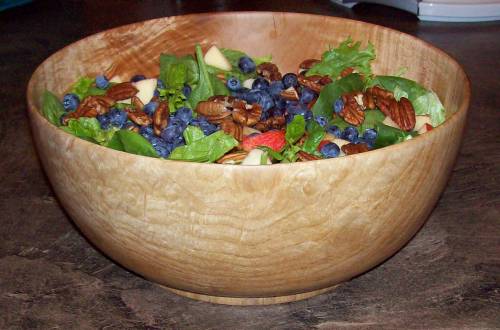
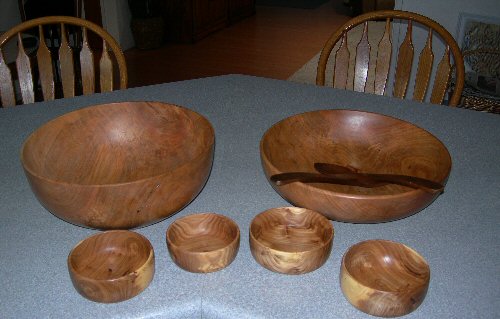
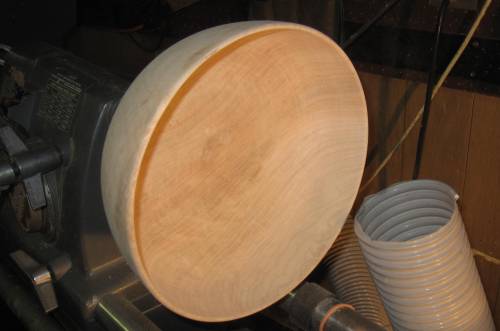
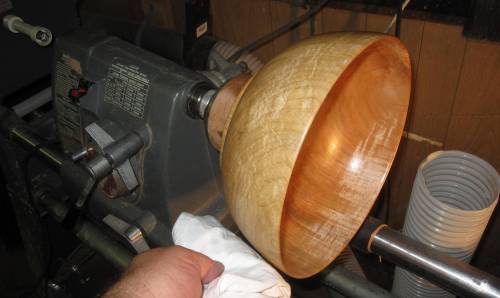
The completed Bowl
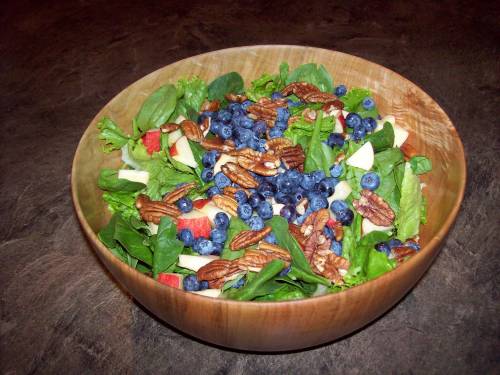
From a totally green round to functional salad bowl in 5 months!

The salad looks pretty decent too.
For 2010 - the End
2011 Update - The Second Salad Bowl with Matching Plate