
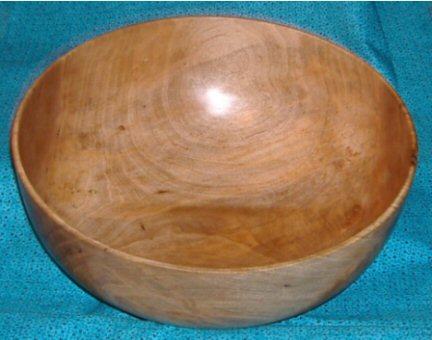
Maple Salad Bowl.
14” x 5.75”

10/15/2005
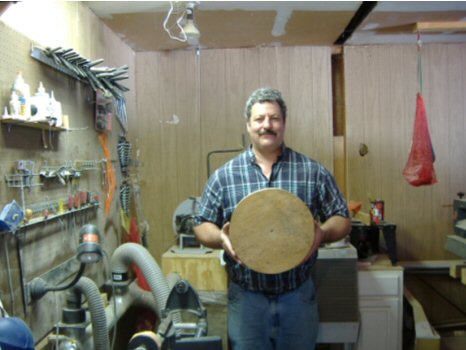
This is supposed to be a Christmas present for my wife, who likes tossing large salads and has never had a large salad
mixing bowl.
Over the last few months I have been slowly progressing to larger pieces of wood and bigger turnings so that I could
assure myself that with some degree of confidence I could turn a salad bowl.
The rounds had a number of bug holes throughout the wood and after consulting my technical support down at the local
Wood Crafters, I decided to leave the holes as is on the outside of the future bowl.
I think I will fill any bug holes inside the bowl with just superglue instead of glue and sawdust. That should look more
unique and it would be safe. It would be rather hard to clean food particles from bug holes on the inside of the bowl.
Notice the ½” hole drilled in the center of the round. That is step 1.
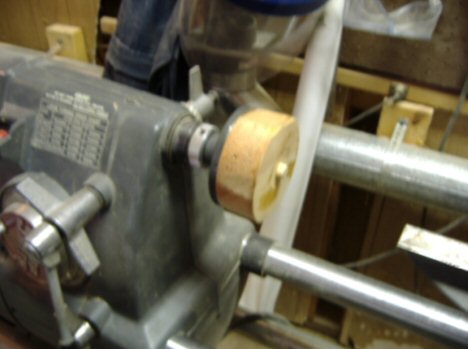
Sacrificial
Block
I don’t think Debbie fully realizes how large a 15” x 6” bowl is but in order to turn one that size I will have
to use just about the entire round. If I mount the round directly to the faceplate I will lose almost an inch
of height because the mounting screws need that much to safely grab the round.
A way to maximize the wood for the bowl is to make a sacrificial block.
This block is made out of a piece of scrap 2x4.
It is turned round with a ¼” nib in the center. The nib is about ½ wide.
The block is attached to the faceplate behind it with six long wood screws ensuring a strong and safe
grip.
This will then be removed from the lathe and glued to the maple turning round.
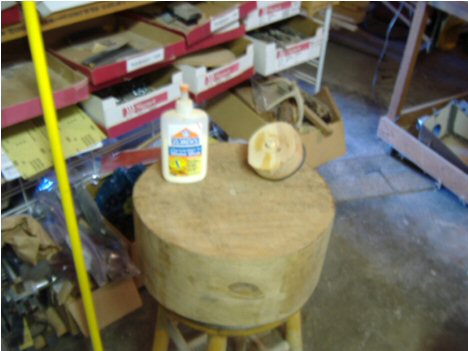

Maple
Round @ 15" Wide
This is supposed to be a Christmas present for my wife, who likes tossing large salads and has never had a large salad
mixing bowl.
Over the last few months I have been slowly progressing to larger pieces of wood and bigger turnings so that I could
assure myself that with some degree of confidence I could turn a salad bowl.
The rounds had a number of bug holes throughout the wood and after consulting my technical support down at the local
Wood Crafters, I decided to leave the holes as is on the outside of the future bowl.
I think I will fill any bug holes inside the bowl with just superglue instead of glue and sawdust. That should look more
unique and it would be safe. It would be rather hard to clean food particles from bug holes on the inside of the bowl.
Notice the ½” hole drilled in the center of the round. That is step 1.

I don’t think Debbie fully realizes how large a 15” x 6” bowl is but in order to turn one that size I will have
to use just about the entire round. If I mount the round directly to the faceplate I will lose almost an inch
of height because the mounting screws need that much to safely grab the round.
A way to maximize the wood for the bowl is to make a sacrificial block.
This block is made out of a piece of scrap 2x4.
It is turned round with a ¼” nib in the center. The nib is about ½ wide.
The block is attached to the faceplate behind it with six long wood screws ensuring a strong and safe
grip.
This will then be removed from the lathe and glued to the maple turning round.

Sacrificial Block Prior to
Attachment to the Turning Round
Some
things don’t change over the years and one of them is
Elmer’s Carpenter Glue.
This is a glue for wood and it forms a very strong bond.
The ½” hole in the round is filled with glue and the bottom of the sacrificial block is coated as well.
The block is then pressed into the round.
The round was cut with a band saw and there was a center marking hole so I knew the drilled hole close
to center.
The sacrificial block was turned on a lathe so I know the nib is close to center.
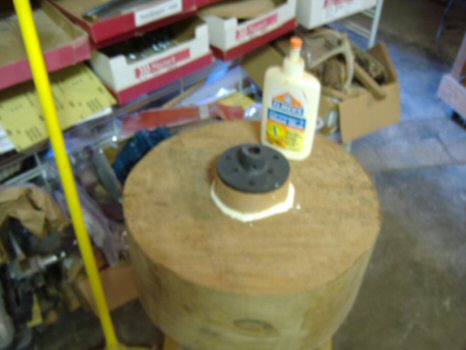

Sacrificial
Block Glued to the Turning Round
Gluing the two pieces of wood together is not quite good enough for me so I also run a bead around the
circumference to help ensure a good bond. This is a holdover from my welding days.
The glue will take at least two days to set and harden. I do not rush this because this piece of wood is
about 15 pounds.
Imagine 15 pounds spinning at 700 rpm and then letting loose. Bad things are sure to happen.
The metal piece on top of the block is the faceplate.
There are six screws attaching the faceplate to the block.
The block is glued to the turning round. The faceplate will then attach to the lathe.
10/17/2005
Getting the
bowl round.
Now for the most excitement I will have for a while – initially starting the lathe.
1. Check to ensure the lathe is set for SLOW speed.
2. Ensure the tool rest does not contact the turning round.
3. Stand well back, turn on the lathe and pray for no catastrophes.
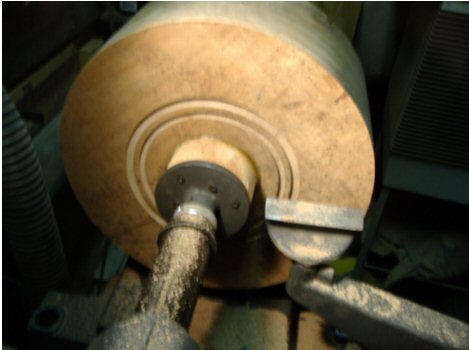
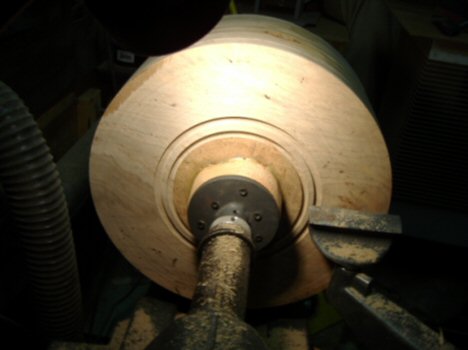
4. There were no major surprises so it is time to get the circumference round.
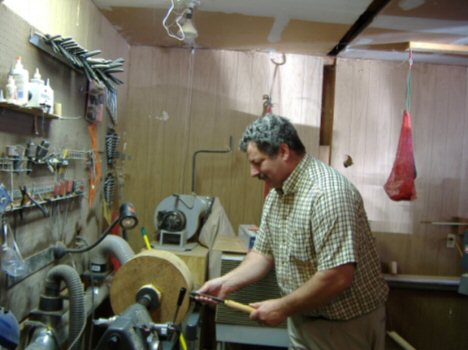
5. What is wrong with picture? - No Safety Glasses!
6. Find Safety Glasses
7. The rounding goes well. Very little vibration. Takes about 15 minutes.
8. Now it is time to work on the bowl bottom.
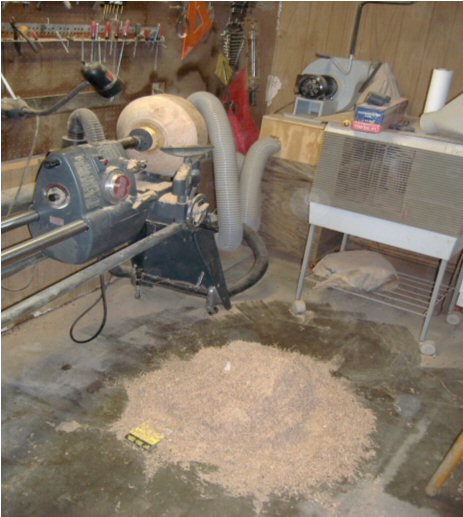
The job is
not over until the trash is taken out.
I don’t think the picture needs further comment.
10/18/2005
Gluing the two pieces of wood together is not quite good enough for me so I also run a bead around the
circumference to help ensure a good bond. This is a holdover from my welding days.
The glue will take at least two days to set and harden. I do not rush this because this piece of wood is
about 15 pounds.
Imagine 15 pounds spinning at 700 rpm and then letting loose. Bad things are sure to happen.
The metal piece on top of the block is the faceplate.
There are six screws attaching the faceplate to the block.
The block is glued to the turning round. The faceplate will then attach to the lathe.
10/17/2005

Future
Bowl Mounted on Lathe
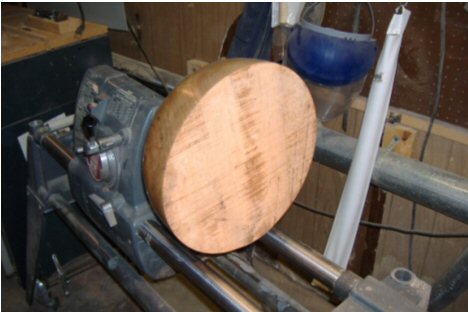
Well, it is two days later and after a boring day at the office it is time to get started on the bowl.
The glue is hard to the touch and has gone fully translucent so the round can now be mounted to the
lathe.
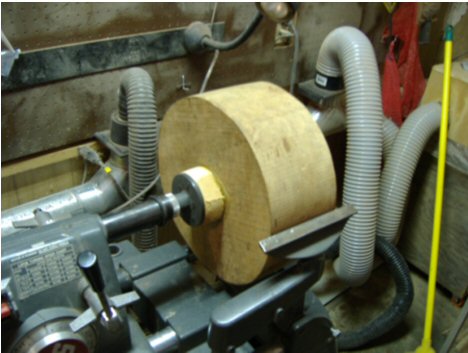
The faceplate is mounted to the lathe and secured with an Allen screw. The block is supported on the
other side by what is called a floating center which looks like a really sharp spike mounted on bearings.
Even though the turning round looks round it is not truly round. Notice the flat spot on top of the round.
The round is always initially supported on both sides because there is going to be vibration.
In front of the round is a tool rest. The rest is for supporting wood turning tools.

Now for the most excitement I will have for a while – initially starting the lathe.
1. Check to ensure the lathe is set for SLOW speed.
2. Ensure the tool rest does not contact the turning round.
3. Stand well back, turn on the lathe and pray for no catastrophes.
4. There were no major surprises so it is time to get the circumference round.
5. What is wrong with picture? - No Safety Glasses!
6. Find Safety Glasses
7. The rounding goes well. Very little vibration. Takes about 15 minutes.
8. Now it is time to work on the bowl bottom.

Defining the bowl base.
I still have not gone to a store and actually looked at a salad mixing bowl so this takes a little thought.
I figure the bowl should have a bottom about one third the overall bowl diameter, which is about six
inches. A head of lettuce is about that size so I think this should be about right.
I change tool rests and restart the lathe. I use the parting tool and cut two grooves about ¼” deep.
The wood left in between the two grooves will become the bowl base.
This particular method is actually of my own creation and I think it works rather well.
You are not limited to a particular size for your bowl bottom using this method.

Getting the Bowl Bottom Flat
I have defined where I want the bowl base but I do not know that the bottom is flat so I start cutting wood
from the bottom until I see new wood. Once I have that I know it is flat.
I spend another ten minutes or so making the bottom slightly convex, sloping the bottom out until I see
new wood. I now know the bottom is flat and the circumference is round.
Vibration is a big deal so all these preliminary cuts are to get the blank as centered and as round as
possible.
Time for a Pepsi break. When I get back I will start contouring the side of the bowl.
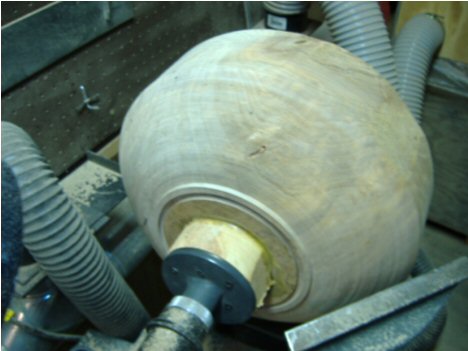

Profiling the
Bowl. End of Day One.
Whew! My hands are tired. It took almost two hours to get it this far.
Enough wood has been removed so you can see the bowl base as it will appear. About half of the bowl side has been turned. It is starting to show some nice grain.
I think the bowl will need to slope up more because it looks like you would not be mixing a head of lettuce; you would simply be stirring it around the bottom if this profile is kept.
Like I said, I don’t think Debbie realizes how big a salad bowl this will be.
Considering that and the fact that I still not have gone to the store and looked at one,
this will be a project with a lot of ‘character’.

I don’t think the picture needs further comment.
10/18/2005

Temporary Finish
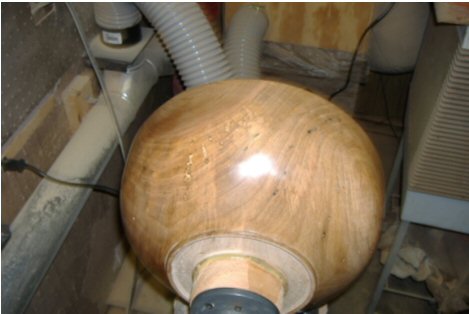
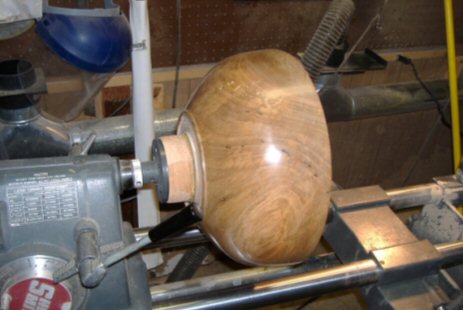
Three hours later the exterior of the bowl has a temporary finish applied so I can see what the end
product will look like.
There were no major surprises. I refined the bowl base a bit more and the size looks about right.
The only thing I like less than painting is sanding.
Sanding took over an hour but would have taken longer if not for a nifty little device I bought from Sears
called a 3D Sander.
It is a palm sized sander that utilizes 3 small sanding discs mounted on ball bearings.
The discs can swivel, which allows for use on concave or convex surfaces.
The discs spin from 0 – 800 rpm, which helps prevent gouging the surface.
I would say the tool saved me an hour of sanding time.
I would have sloped the sides up a little more but I decided to stop there for artistic reasons.
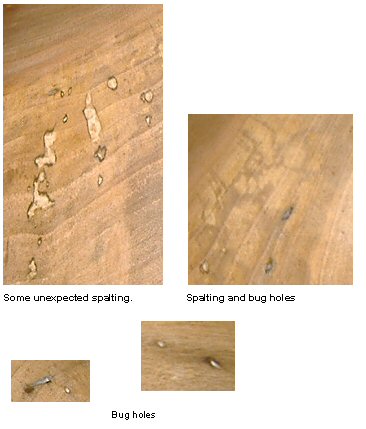
The artistic reason was the discovery of some spalting in the wood.
Spalting occurs when wood begins to decay or has been damaged, allowing minerals and other materials
inside.
Spalting can add character to the wood and is often desirable.
I stopped profiling the bowl exterior because there was a possibility of removing the spalting since it
typically works its way from the outside in and it looked like the process was just beginning.
The black marks are bug holes, which I will be leaving intact.
Amazing that people punch holes in furniture to achieve the same effect.
Three hours later the exterior of the bowl has a temporary finish applied so I can see what the end
product will look like.
There were no major surprises. I refined the bowl base a bit more and the size looks about right.
The only thing I like less than painting is sanding.
Sanding took over an hour but would have taken longer if not for a nifty little device I bought from Sears
called a 3D Sander.
It is a palm sized sander that utilizes 3 small sanding discs mounted on ball bearings.
The discs can swivel, which allows for use on concave or convex surfaces.
The discs spin from 0 – 800 rpm, which helps prevent gouging the surface.
I would say the tool saved me an hour of sanding time.
I would have sloped the sides up a little more but I decided to stop there for artistic reasons.

The artistic reason was the discovery of some spalting in the wood.
Spalting occurs when wood begins to decay or has been damaged, allowing minerals and other materials
inside.
Spalting can add character to the wood and is often desirable.
I stopped profiling the bowl exterior because there was a possibility of removing the spalting since it
typically works its way from the outside in and it looked like the process was just beginning.
The black marks are bug holes, which I will be leaving intact.
Amazing that people punch holes in furniture to achieve the same effect.

Front Support Removed
The Bowl has been disengaged from the front support to allow for hollowing the inside of the bowl.
I will first spin it up on slow speed and check for vibration. If it appears to be spinning too fast,
I will add a speed reducer. Slow speed is 700 – 800 rpm.
The speed reducer will knock slow speed back to 100 rpm.
Once you have a piece mounted on a lathe you really do not want to remove it, which I would have to do
to add the reducer.
Every time you move your working piece, you run the possibility of losing the absolute center.
If you lose center, the bowl will not hollow out evenly.
You may have a ¼” wall thickness on one side and 1/8” on the opposite side.

Bowl Front
Boy, that bowl looks big. I wonder if Debbie…… whoops, already covered that.
Now comes the fun part – hollowing out the interior of the bowl.
This is the part where I smack fingers, bang tools and create general havoc unless I am very careful.
The problem here is being left handed and working on a concave surface.
I mimic a right handed person would which is not quite the same as being right handed.
Geat excuse, huh.
I cannot take the machine apart and reverse the pieces because then I would have a very upset landlord
and lathe owner. I have discovered that if I use some of the hand tools backwards, pulling instead of
pushing that I can minimize these problems.
I am really not looking forward to this, which makes it a good time to stop for the evening.
Half the support and twice the possibility of disaster.
